

Hey there! If you’re like me, you might find yourself dreaming of a cozy, personalized outdoor space, especially if you’re living in an apartment. That’s where the magic of a ‘Balcony Makeover DIY’ comes into play. It’s not just about giving your balcony a fresh coat of paint; it’s about transforming it into your little haven, a place where you can relax, enjoy a cup of coffee, or just breathe in some fresh air.
Whether you’re a seasoned DIY enthusiast or just starting, this guide is packed with tips and tricks to help you revamp your balcony without breaking the bank or getting lost in technical jargon.
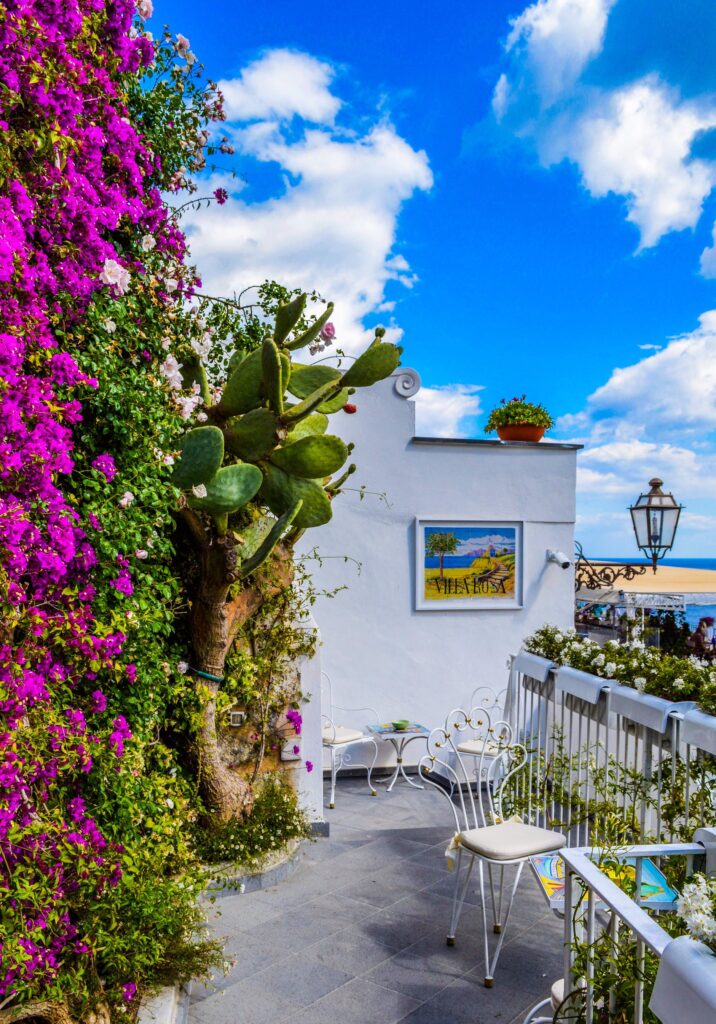
Starting Your Balcony Makeover DIY Project
Kicking off your balcony makeover DIY project can be a thrilling adventure. Remember, planning is crucial – it sets the stage for a successful transformation of your space into a cozy, personalized retreat. So, grab that notebook, let your imagination run wild, and start sketching out your dream balcony!
Assessing Your Balcony Space
So, you’ve decided to give your balcony a makeover – awesome! Understanding your space is key. Grab a tape measure and jot down the dimensions of your balcony. It’s not just about length and width; consider the height too, especially if you’re thinking about hanging plants or lights. Next up, play detective with the sun. Does your balcony bask in the morning light or catch the sunset? This little bit of homework will help you decide on plants that’ll thrive and the best spot for your comfy chair.
Setting a Budget for Your DIY Balcony Makeover
Let’s talk numbers. Balcony makeover DIY doesn’t mean you have to spend a fortune. Set a realistic budget for yourself. Think about what you can DIY and where it’s worth spending a bit more. Scour online marketplaces for second-hand deals or hit up local yard sales. Innovation can make a big difference!
Must-Have Supplies for Your Balcony Makeover DIY
When you dive into your balcony makeover DIY project, It’s vital to equip yourself with the right tools and materials. Remember, the right tools and materials make your balcony makeover DIY not only smoother but also more enjoyable. Let’s get started on creating that dream balcony!
Choosing the Right Tools for DIY Tasks
Every craftsman needs their tools, right? For a balcony makeover, you don’t need an extensive toolkit. A hammer, screwdriver, measuring tape, and perhaps a drill are good starters. And hey, safety first – don’t forget gloves and goggles!

Selecting Materials for Durability and Aesthetics
When it comes to materials, think durable yet stylish. Opt for weather-resistant woods or metals for furniture. And if you’re eco-conscious, there are fantastic sustainable options out there, like bamboo or recycled plastics. It’s all about finding that perfect blend of functionality and flair.
Creative Ideas for Your Balcony Makeover DIY
Transforming your balcony into a charming and personalized space can be both exciting and fulfilling. With a little creativity and some DIY spirit, you can turn your balcony into a delightful retreat that mirrors your unique style. Here are some creative ideas for your ‘Balcony Makeover DIY’ project that are sure to spark inspiration.
1. Maximizing Small Spaces
If you’re working with a smaller balcony, space optimization is key. Here are a few tips for small spaces organization:
- Foldable and Multi-purpose Furniture: Choose furniture that can be easily stored or used for multiple purposes. A foldable table or a bench that doubles as storage can be real space savers.
- Vertical Gardening: Instead of traditional pots, consider vertical gardening. Wall-mounted planters or trellis with climbing plants can add greenery without taking up floor space.
- Utilize Wall Space: Install shelves or hooks on the walls for decorations or plants. This keeps the floor clear and makes your balcony look bigger.
2. Adding a Personal Touch
Your balcony makeover should reflect your personality. Transform this area into a unique sanctuary that reflects your personal style.
- DIY Decor Projects: Handmade items like painted pots, macramé plant hangers, or a mosaic tabletop add a unique touch.
- Theme and Color Scheme: When selecting a theme or colors, go for what resonates with you deeply. Whether it’s vibrant and tropical or calm and neutral, let your balcony be an extension of your personal style.
- Lighting: String lights, lanterns, or DIY candle holders can create a cozy and inviting ambiance. Perfect for those relaxing evenings!
3. Eco-friendly Choices
In today’s world, it’s vital to consider eco-friendly choices in your design decisions.
- Recycled Materials: Use recycled or upcycled materials for your DIY projects. Old pallets can be turned into furniture, and used jars can be transformed into planters.
- Sustainable Plants: Opt for local indoor plants and sustainable plants that require less water and maintenance. They’re better for the environment and easier to care for.

4. Interactive Elements
Your balcony is not just a seating area. Here are some ideas to make it interactive:
- Herb Garden: Grow a small herb garden. It’s practical, looks great, and you can enjoy fresh herbs in your cooking.
- DIY Bird Feeder: Attract birds with a simple DIY bird feeder. Infusing your balcony with vibrant elements brings a touch of nature right to your doorstep.
By incorporating these creative ideas in your ‘Balcony Makeover DIY’, you can create a space that is not only aesthetically pleasing but also functional and unique to you. The beauty of DIY projects is their flexibility – there are no set guidelines, just follow your creative instincts.
Step-by-Step Guide to Implementing Your Balcony Makeover DIY
Embarking on your balcony makeover DIY project is an exciting adventure, a journey that transforms your outdoor space into a personalized oasis. Here’s a step-by-step guide to ensure your balcony revamp is not just successful but also enjoyable.
1. Preparation is Key
- Clear the Deck: Start by clearing your balcony. Remove old furniture, sweep away debris, and give the floor a good wash. It’s like setting a blank canvas before painting.
- Safety Checks: Ensure any railings are secure and that there are no loose tiles or hazardous elements. Safety is paramount in any DIY project.
2. Plan Your Design
- Vision Board: Create a vision board for your balcony makeover DIY. This can be a collage of images, color swatches, and ideas that inspire you. It helps to visualize the end result.
- Measure Twice: Accurately measure your balcony space. This ensures that the furniture and plants you choose fit perfectly without overcrowding the area.
3. Select a Theme
- Theme Selection: Decide on a theme or style for your balcony. Whether it’s a tropical retreat, a modern minimalist space, or a colorful bohemian nook, let your personal taste lead the way.
4. Choose Your Colors
- Color Palette: Select a color palette that complements your chosen theme. This could be serene blues and greens for a calming effect or vibrant hues for a more energetic space.

5. Furniture and Decor
- Functional Furniture: Pick furniture that is not only stylish but also functional. Consider foldable chairs or a small bistro set for smaller balconies.
- DIY Decor: Add a personal touch with DIY decor. Hand-painted pots, homemade wind chimes, or a small DIY vertical garden can add character to your space.
6. Implementing Your Plan
- Step-by-Step: Tackle each aspect of your balcony makeover DIY one step at a time. Start with the larger items like flooring or painting, then move to furniture, and finally, the smaller decor details.
- Troubleshooting: If you encounter any issues, don’t hesitate to consult online resources or seek advice from fellow DIY enthusiasts. Remember, it’s a learning process.
7. Accessorize and Personalize
- Accessorize: Add accessories like cushions, rugs, and outdoor lighting. These elements can significantly enhance the ambiance of your balcony.
- Personal Touches: Include items that reflect your personality – maybe a string of fairy lights for a whimsical touch or a small herb garden for green thumbs.
8. Final Touches
- Review and Adjust: Once everything is in place, take a step back and review. Sometimes, moving a chair or adding a plant can make all the difference.
- The Final Look: Ensure everything comes together cohesively, creating a space that is not just beautiful but also a reflection of your unique style.
9. Enjoy Your New Space
- Relax and Revel: Now that your balcony makeover DIY is complete, take the time to enjoy it. Whether it’s sipping morning coffee or reading a book in the evening, cherish the space you’ve created.
Maintenance Tips for Your DIY Balcony Makeover
Keeping your balcony makeover DIY project looking fresh and inviting is all about regular maintenance. Here are a few easy tips to ensure your balcony remains your personal haven:

- Regular Cleaning: Sweep away leaves and debris, and give the floor a gentle wash regularly. This not only keeps your space tidy but also prevents any long-term damage.
- Furniture Care: If you’ve got wooden furniture, a yearly coat of sealant will help it withstand the elements. For metal pieces, check for rust spots and treat them promptly.
- Plant Love: If you’ve added plants, they’ll need some TLC. Water them according to their needs, and don’t forget to prune and deadhead flowers to encourage new growth.
- Seasonal Checks: With each season, do a quick check. Secure any loose items before windy weather, and in winter, consider covers for your furniture.
- Quick Fixes: Address small issues like loose screws or chipped paint as soon as they arise. It’s easier to manage little fixes than big repairs.
By following these simple maintenance tips, your balcony makeover DIY will not only look great but also be a space you can enjoy year-round!
Conclusion
There you have it! Easy and affordable Balcony Makeover DIY ideas and step-by-step guide to creating a balcony space that feels like a little piece of paradise. It’s amazing what a bit of creativity, some elbow grease, and a personal touch can do. Now, go on, step outside, and enjoy your newly transformed balcony. And hey, why not share your makeover journey with us? We’d love to see what you’ve created!


